How-to guide
How to embroider a dog: a beginner's step-by-step
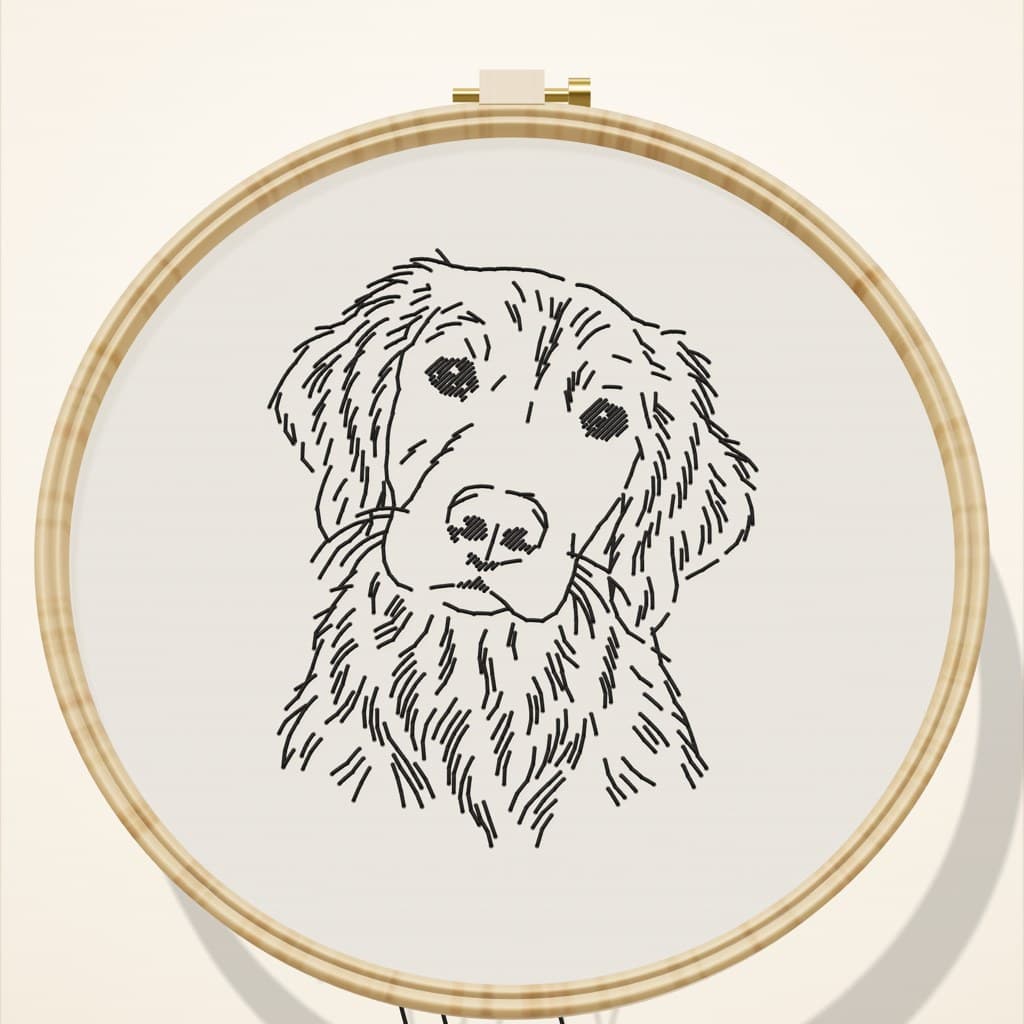
To embroider a dog, start with a line pattern made from your own dog's photo. Back stitch the outline and ears first with 2 strands of black floss, then fill the eyes and nose with satin stitch, and finish with short fur lines stitched from root to tip. Stop when it looks like your dog.
Will it actually look like my dog?
It's the question every beginner asks, and it's a fair one. The honest answer: likeness doesn't come from stitching skill. It comes from three things.
- The outline and the ears. The shape of the head and the exact angle of the ears are what you recognize from across the room. A pattern traced from your own photo gets them right.
- The eyes. Where they sit, how far apart, and the small highlight that makes them shine. Get these right and the portrait looks alive.
- Restraint. A few well-placed fur lines look more like your dog than a hundred extra ones.
That's why a generic dog pattern rarely looks like your dog, and a pattern from your own photo usually does. Turning a photo into a pattern shows how.
Before you start
- Your pattern on fabric. Printed on a stick and stitch sheet and smoothed onto linen.
- A drum-tight hoop. A 6-inch hoop, tightened in small rounds until a tap sounds like a drum.
- Thread ready. About 18 inches of black floss, fingertip to elbow, with 2 strands pulled out one at a time.
- No knot. Start with a loop start or a waste knot, so nothing lumps under the linen.
- A few practice stitches. On a scrap, or in the free 3D simulator.
How to embroider a dog, step by step
- Start at the top of the head. Bring the needle up one dot along the outline, then go down at the first dot. Working from the top down keeps your hand off finished stitches.
- Back stitch the outline. Come up one dot ahead, go down into the last hole. Keep that rhythm around the head, ears, chin and chest. On tight curves like ear tips, slow down and land exactly on each dot.
- Stitch the face lines. The line of the muzzle, the edges of the nose and the mouth. The mouth is usually two small lines, and it carries the whole expression, so take your time.
- Fill the eyes. Satin stitch from the middle of the pupil out to one side, then back to the middle and out to the other. Leave the highlight bare. How to embroider eyes.
- Fill the nose. The same satin stitch, leaving the small bare spots that give the nose its shine. How to embroider a nose.
- Add the fur. Short back stitches from the root toward the tip, the way the coat grows. Finish one area before you move on, so the thread on the back stays short. How to embroider fur.
- Step back and squint. Prop the hoop across the room and squint at it. If it already looks like your dog, stop. Leftover dots rinse away with the sheet.
- Rinse and finish. Soak the sheet away, press the linen face-down on a towel, and finish the back of the hoop.
Try the outline stitch first
Back stitch is most of a dog portrait. You can try it on a 3D hoop before you touch fabric: watch the first stitches, tap where your needle goes, and flip the hoop to see what the back should look like.
Free · 3D Stitch Simulator
Try back stitch on a 3D hoop
Watch the first stitches, then tap where your needle goes. Turn the hoop, zoom in, and flip it over to check the back.
Beginner mistakes, and the easy fixes
- Starting with the eyes.
- The eyes are the hardest part to get right. Do the outline first, so you've had an hour of practice before you reach them.
- Long stitches to go faster.
- Skipping dots makes fur look spiky and curves look jagged. One stitch, dot to dot, every time.
- Pulling the thread tight.
- Tight stitches pucker the linen between lines. Let each stitch just lie flat.
- Jumping across the back.
- Black floss carried across bare linen shows through as a grey shadow. Slide under stitches you've already made, or tie off and start again.
- Stitching every fur line.
- For a first hoop, a Simple pattern is plenty: the outline, the face and the longest fur lines. Add more later only if it needs it.
Does the breed change anything?
A little. Smooth coats like a French bulldog or a dachshund need very few fur lines: the outline does the work. A feathered coat like a golden retriever gets a few long, curved strokes on the ears and chest. Very dark or all-black dogs are the hardest to work from, because a dark coat hides its own edges in a photo. Use your brightest daylight photo.
Size matters less than you'd think. Big dog or small, the portrait is a head and shoulders about 4 to 5 inches tall in a 6-inch hoop.
Questions people ask
How do you embroider a dog for beginners?
Work from a line pattern of your own dog. Back stitch the outline and face lines first, fill the eyes and nose with satin stitch, then add a few fur lines from root to tip. Two strands of black floss for all of it.
Where do you start: the eyes or the outline?
The outline. Start at the top of the head and work down. By the time you reach the eyes, you've had plenty of practice and your stitches are even.
How do you make it actually look like my dog?
Work from a pattern made from your own photo, get the eyes and the ear shapes right, and keep the fur lines few. Then check it from across the room with the squint test.
How do you embroider a dog face?
Back stitch the outline of the head and muzzle, add the mouth as two small lines, then fill the eyes and nose with satin stitch, leaving the highlights bare.
How do you embroider dog fur?
With short back stitches that follow the way the coat grows, from the root toward the tip. A few lines at the ears, cheeks and chest are enough for a line-art portrait.
Sources: Royal School of Needlework Stitch Bank: Back stitch · Needle 'n Thread: Sewing vs. stabbing · Needle 'n Thread: 10 tips for a sensational satin stitch