
Dog breed
Chihuahua embroidery pattern: stitch your own chihuahua from a photo
To embroider a chihuahua, back stitch the very large, upright ears and the round, apple-dome head first, then satin stitch the big, round eyes and the small nose. A smooth coat needs only a few fur lines and whiskers, so it's a quick one to stitch. Use 2 strands of black floss on oatmeal linen in a 6-inch hoop.
- Coat Smooth or long, in any color
- Ears Large erect ears
- Look for Huge ears, apple-dome head, big round eyes
- Line-art fit great
The real pattern: Peanut, our sample chihuahua
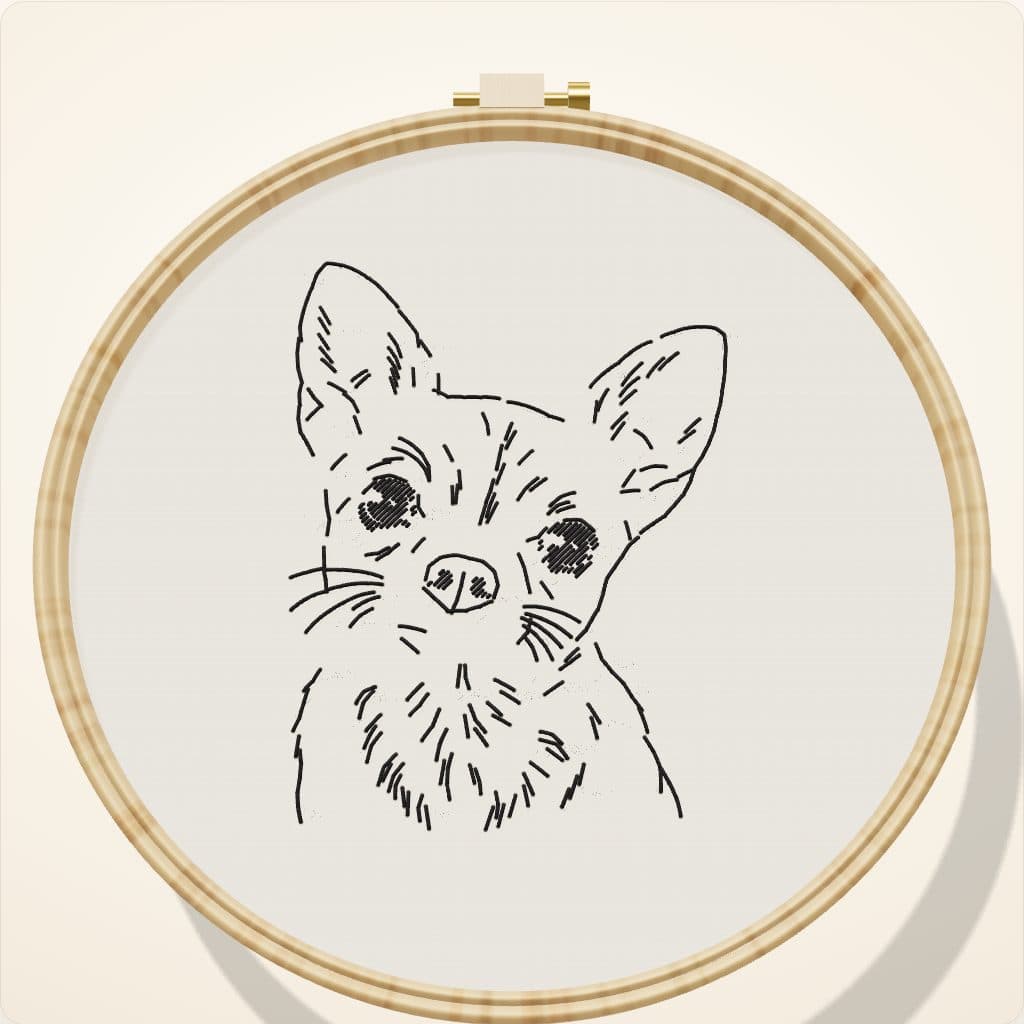
Our pattern maker made this from a photo of Peanut, a smooth-coated fawn chihuahua and one of the sample dogs we use to test it. The photo is an AI-made sample image. The drawing, the dots and the stitched preview are its real output.
 1 The photoA sample photo (AI-made)
 2 The drawingClean line art, made by the pattern maker
- 3 The patternA dot at every needle hole, about 1/8 inch apart
- 4 StitchedA preview drawn from the pattern, in a 6-inch hoop
- Back stitches
- 331
- Satin fills
- 6 (eyes, nose and any small dark marks)
- Design size
- 3.4 × 4.6 in
- Thread
- 2 strands of black
- Rough stitching time
- 2–3 hours
Peanut's ears take up a big part of the pattern, and they should. Inside the head there's very little: the round eyes, the small nose, a few whiskers and a few short fur lines.
What makes a chihuahua look like a chihuahua in thread
The chihuahua standard describes a well-rounded "apple dome" skull, large erect ears that flare out to the sides when relaxed, and full, round eyes set well apart. Chihuahuas come in any color, with a smooth coat or a long coat with fringed ears. In line art the ears and the eyes are the dog.
- The ears are huge. Stitch each one from the base to the tip and back, landing on the tip dot. If your dog's ears flare out sideways, keep that angle. It's part of the look.
- An apple-dome head. Keep the top of the skull a round, smooth curve, with a clear dip down to the short muzzle.
- Big round eyes. Satin stitch each eye from the middle out to its round edge and leave a highlight. Don't make them smaller than the pattern shows.
- Long coats get fringe. A long-coat chihuahua has fringed ears: add a few longer strokes off the edge of each ear.
Getting a good photo of your chihuahua
- Get down to its level, or lift your chihuahua onto a sofa. From standing height you'll get the top of the head and not much else.
- Keep both ear tips in the frame, with space around them. They're wider than you think.
- Use soft daylight. Pale coats and thin, pink ears can wash out in bright sun.
- Black or chocolate chihuahuas: shoot by a big window or outdoors in open shade, and wait for a catchlight in each eye.
Stitching order for a chihuahua
- Ears first. Back stitch both ears from the base to the tip and back, landing on the tip dots.
- The dome. Stitch the round top of the head between the ears, then the cheeks and the short muzzle.
- Eyes and nose. Satin stitch both eyes from the middle out, leaving a highlight in each, then fill the small nose.
- Whiskers and ear fur. Add the short whisker strokes and the fur lines inside the ears.
- Chest, then stop. Stitch the few fur lines on the chest. A chihuahua is quick: stop as soon as it looks like your dog.
Quick enough to leave an evening for a name underneath. Personalized dog gifts has ideas for the words and how to fit them in a 6-inch hoop.
Common chihuahua mistakes
- The ears look small.
- The outline cut inside the tip dots. Go all the way to each tip dot before you turn.
- The head looks flat.
- The top of the skull lost its dome. Follow every dot around the curve instead of cutting across.
- The eyes look uneven.
- One eye's satin went past its outline. Keep every stitch inside the line, from the middle out.
Questions people ask
Can I turn a photo of my Chihuahua into an embroidery pattern?
Yes. The Stitch Your Dog course turns a photo of your own chihuahua into a pattern with a dot at every stitch, the way it made Peanut's here. Get down to its level and keep both ear tips in the frame.
What stitches work best for a Chihuahua?
Back stitch for the ears, the outline, the whiskers and the fur lines, and satin stitch for the big eyes and the nose. Both are beginner stitches, and they're the two the course teaches.
How do I show a Chihuahua's huge ears in thread?
Outline each ear from the wide base up to the tip and back down, landing exactly on the tip dot, then add a few short fur lines inside. Don't trim them to fit: big ears that flare out are the chihuahua.
How long does a Chihuahua portrait take to stitch?
Peanut's pattern has 422 stitches in all: 331 backstitches and 91 small satin stitches. At an easy beginner pace of 2.5 to 4 stitches a minute, that's roughly 2 to 3 hours, an evening or two.
Is there a free chihuahua embroidery pattern?
The pattern on this page is a sample to look at. The course makes one from a photo of your own chihuahua, which is the one that will actually look like your dog.
Sources: Stitch Your Dog pattern maker: its photo checks and its real output on our sample dogs (1 Nov 2026) · American Kennel Club: the official Chihuahua breed standard · Royal School of Needlework Stitch Bank: Back stitch · Royal School of Needlework Stitch Bank: Satin stitch