How-to guide
How to read an embroidery pattern: dots, lines and fills
On most hand embroidery patterns, lines show where the stitches go and a key tells you which stitch, which color and how many strands. Our dog patterns are simpler: each dot is one needle hole, about 1/8 inch apart, and you back stitch from dot to dot. Striped shapes get satin stitch. Bare spots inside them stay bare.
A real pattern, mark by mark
Here's the print file our pattern maker made for Bruno, one of our sample dogs, a French bulldog. Every pattern from it has the same marks, so once you can read this one, you can read your own.
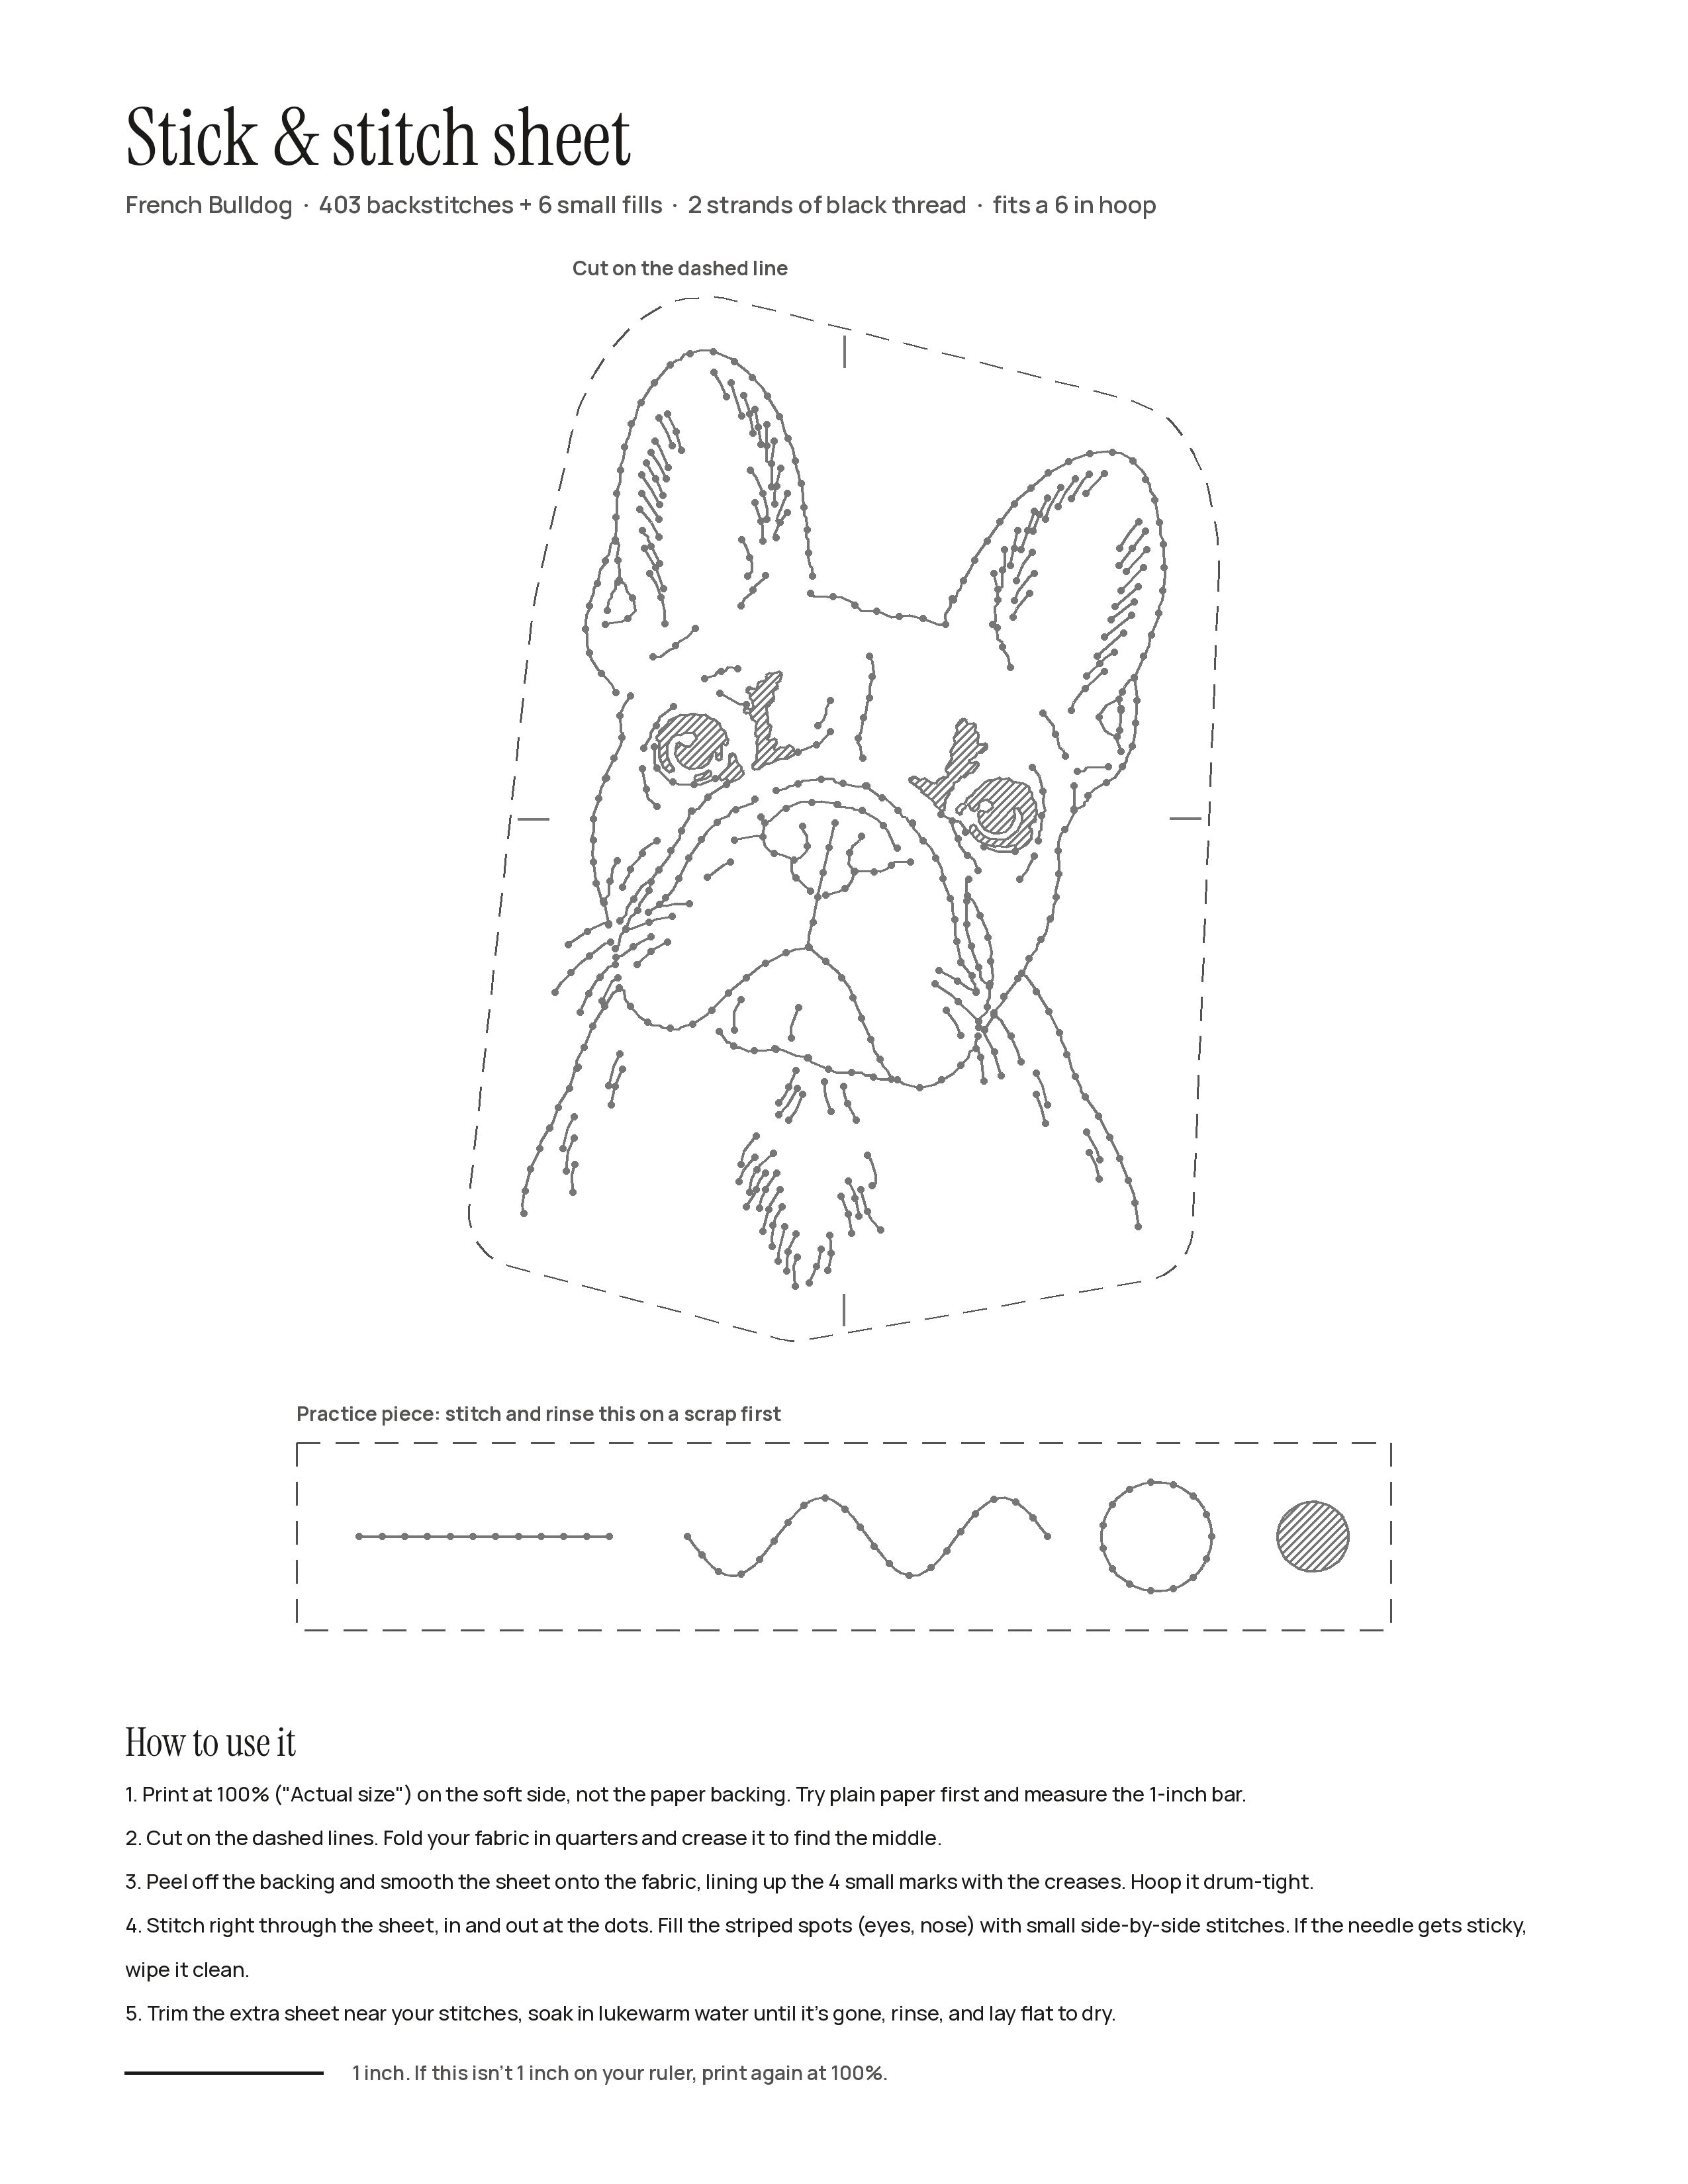
What each mark on our dog patterns means
| Mark | What it means | What you do |
|---|---|---|
| Grey line with dots | A line of back stitch. Each dot is one needle hole, about 1/8 inch (3 mm) from the next. | Come up at one dot and go down at the next. One stitch for each gap. |
| Striped shape | A solid area: a pupil, the nose, a dark corner of the mouth | Fill it with satin stitch, side by side, edge to edge. |
| Bare spot inside a striped shape | A highlight: the shine in an eye or on the nose | Leave it as bare linen, with no thread crossing behind it. |
| Dashed line around the dog | The cutting line | Cut the sheet on it before you peel off the backing. |
| Four short marks on the dashed line | The centering marks | Line them up with the creases from folding your fabric in quarters. |
| The strip at the bottom | The practice piece: a line, a wave, a circle and a filled dot | Stitch it on a scrap and rinse it before you start your dog. |
| The 1-inch bar | The size check | Measure it after a plain-paper print. If it isn't exactly 1 inch, fix the print settings. |
| The line under the title | The breed, the stitch count, the strands and the hoop size | Read it once: it tells you what to have ready. |
Each pattern comes in two versions. Simple has the outline, the eyes and nose, and only the longer fur strokes. Detailed has every fur line. For a first hoop, Simple is the kinder choice: fur is easy to add later and fiddly to take out.
Why a dot at every needle hole
Most embroidery patterns are only lines, and you decide how long each stitch should be. That's where a beginner's lines go uneven: long stitches on the easy stretches, cramped ones on the curves. A dot at every needle hole makes that decision for you. Every stitch comes out the same length, short enough to follow the curve of an ear.
The grey line between the dots shows which dot comes next, so you never have to guess which way a line runs. Keep one copy printed on plain paper beside the hoop. A line is much easier to follow on clean paper than through a sheet that's half covered in thread.
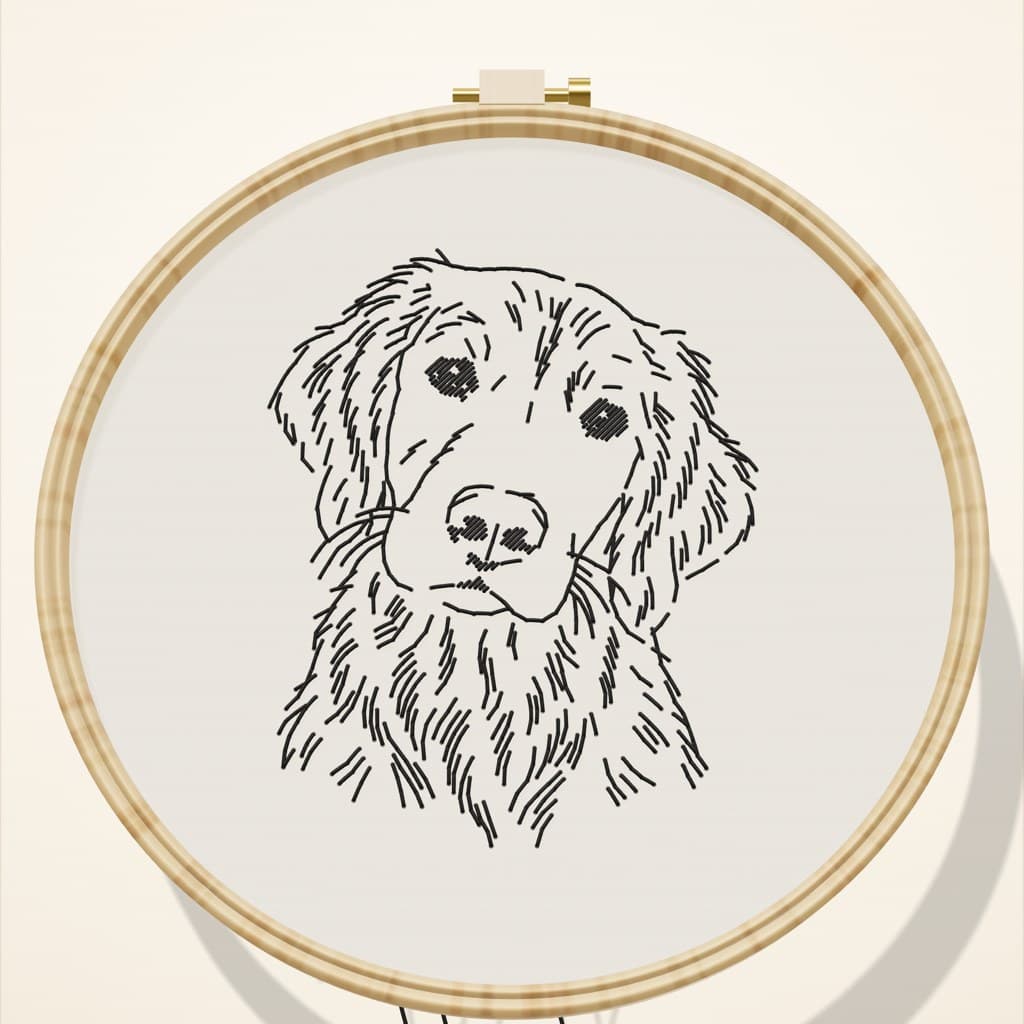
Free · 3D Stitch Simulator
Try back stitch on a 3D hoop
Watch the first stitches, then tap where your needle goes. Turn the hoop, zoom in, and flip it over to check the back.
Watch the needle go from one hole to the next, then tap each hole yourself. Flip the hoop to see the back.
Reading any other embroidery pattern
Patterns from books, kits and designers use a few more marks. Here's what to look for.
- The stitch key. A list that matches each line or label to a stitch. Short codes vary from designer to designer ("SS" can mean satin, stem or split stitch), so always read the key first.
- Color numbers. A number beside a line, like 310, is a thread color from one brand's shade card. DMC 310 is black. Another brand uses different numbers for its colors.
- Strand counts. "2 strands" or "2 str" means you separate 2 of the 6 strands in the floss and thread them together. See how many strands to use.
- Line styles. Some patterns draw stitches differently: a dashed line for running stitch, small circles for French knots, a shaded area for a fill.
- Arrows and fine lines inside a shape. They show which way to lay a fill, like satin or long and short stitch.
- Numbers on the lines. Some designers number the order of work. If yours doesn't, the order below works for most designs.
- A size or a scale. "Print at 100%" or a measured bar. Check it before you transfer anything.
How to follow a pattern, in order
- Read the key and the notes. Find out which stitches, colors and strand counts the pattern uses, and what size it's meant to be.
- Check the size. Print it on plain paper at 100%, with fit to page turned off, and measure the scale bar. A pattern printed too small crowds every line.
- Transfer it. Print it on a stick and stitch sheet or trace it onto the fabric.
- Stitch the outlines first. Lines before fills. On a dog, that's the head and ears, then the face lines, starting at the top so your hand doesn't rest on finished work.
- Then the fills. Satin stitch the eyes and nose, leaving every highlight bare.
- Fine details last. Fur strokes, whiskers and anything in a single strand go in at the end, where nothing will snag them.
- Work in small areas. Finish one area before you move to the next, so the thread on the back stays short and never crosses bare linen.
Tick off each line on your paper copy with a pencil as you finish it. On a pattern with hundreds of dots, it's easy to lose your place.
Pattern-reading mistakes, and the fixes
- Skipping dots to go faster.
- A skipped dot makes one long stitch, and long stitches look spiky. One stitch for every gap.
- Outlining a striped shape instead of filling it.
- Striped means filled. Outline it only if the pattern draws a separate line around it too.
- Stitching over a highlight.
- Unpick the stitches over the bare spot from the back. The highlight is what makes an eye look alive.
- The pattern came out the wrong size.
- If the scale bar isn't right, every stitch length is off too. Reprint at 100% with fit to page turned off.
Questions people ask
What do the dots on an embroidery pattern mean?
On our patterns, each dot is one needle hole. The dots are about 1/8 inch apart, and each gap between two dots is one back stitch. On other patterns, a dotted line can mean running stitch, so check the key.
How do you use an embroidery pattern?
Read the key, print or copy the pattern at the right size, transfer it to your fabric, then stitch the outlines first, the fills next and the fine details last.
What do the numbers on an embroidery pattern mean?
Usually thread colors from a brand's shade card, like DMC 310 for black. Some patterns also number the stitches or the order of work. The key says which.
What does 2 strands mean on a pattern?
Embroidery floss is made of 6 thin strands. Two strands means you separate 2 of them and thread them through the needle together.
What do the shaded shapes on a pattern mean?
A shaded or striped shape is filled, not outlined. On a dog pattern, those are the pupils and the nose, filled with satin stitch, with the small bare highlights left unstitched.
Sources: Stitch Your Dog pattern maker: its photo checks and its real output on our sample dogs (1 Nov 2026) · DMC: How to use stranded thread · Royal School of Needlework Stitch Bank: Back stitch